


Loving the wood bead garland trend, but not loving how expensive they are in stores! I knew I could make a garland at the length that I wanted, in the natural color, and tassel size of my choice! The beauty of doing it yourself, is customization! The garland can translate between seasons which I love, its going from a table centerpiece, to a vase accent on my mantle, to Christmas tree garland!
See how to make it below!
Start by measuring out how long you want the garland to be, this can be an exact measurement or an estimate. Once you have that measurement, add 16 inches to that measurement. You will want 8 extra inches on each end for the tassels.
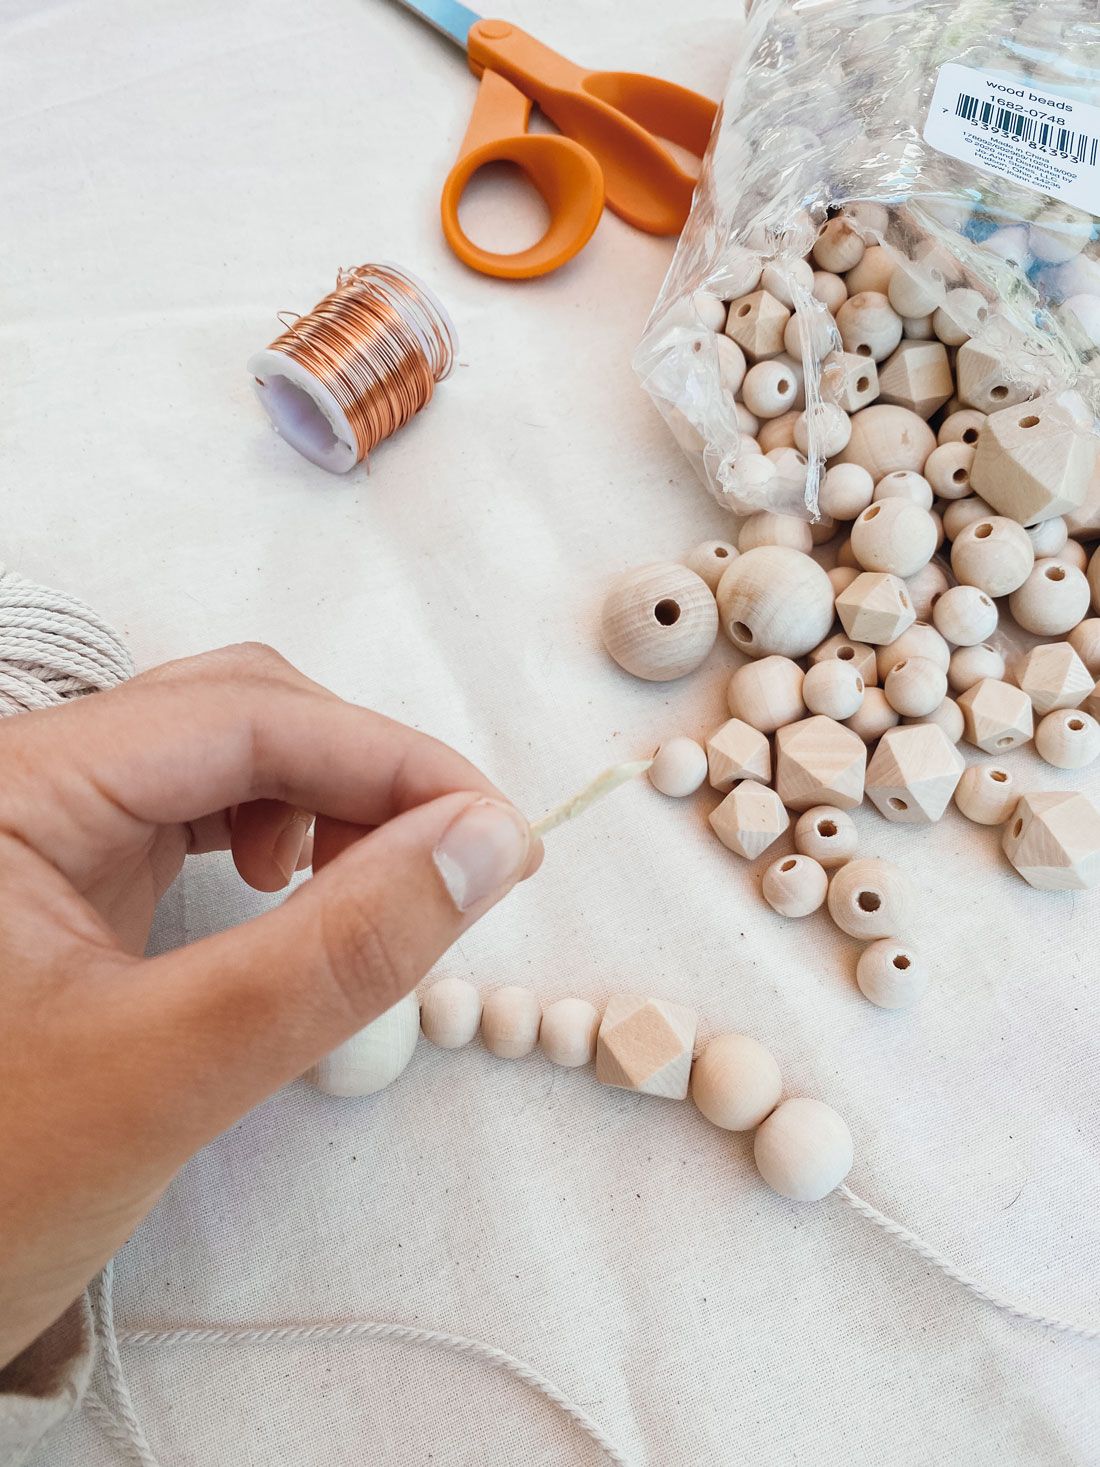
Once you have your string cut, tear a strip of masking tape and wrap it tightly around the end of the string. That will make stringing on your beads a whole lot quicker and easier!
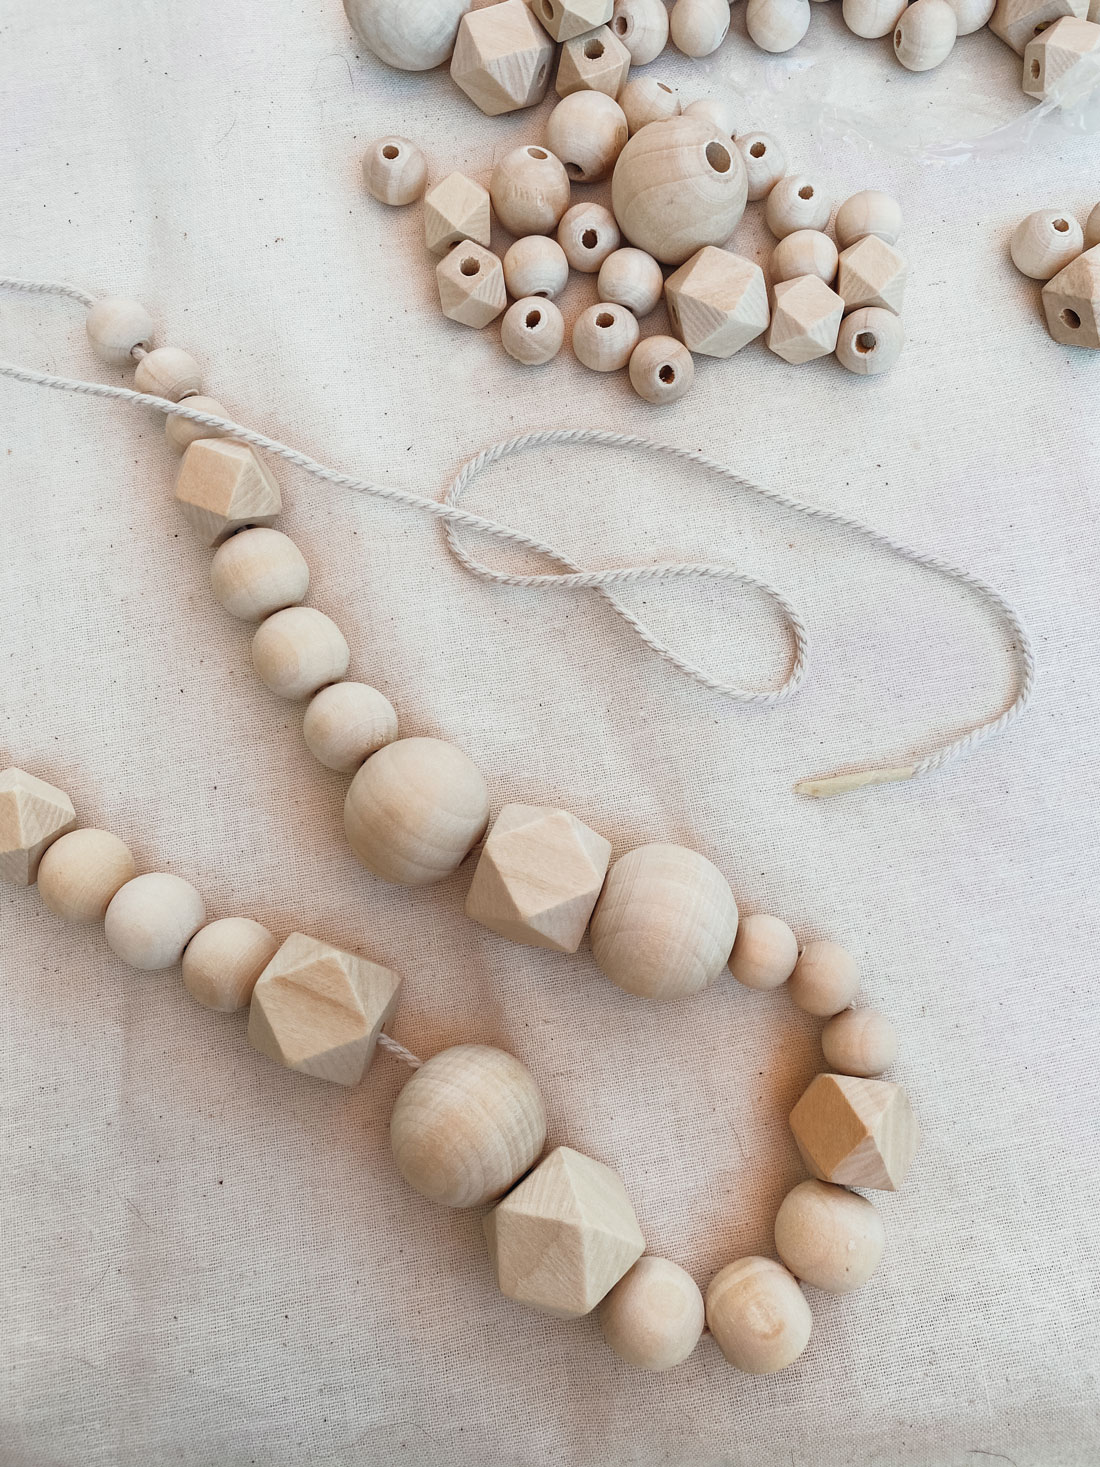
I got beads that were different sizes and shapes, that is the cool thing about making your own, you can customize it to your liking!
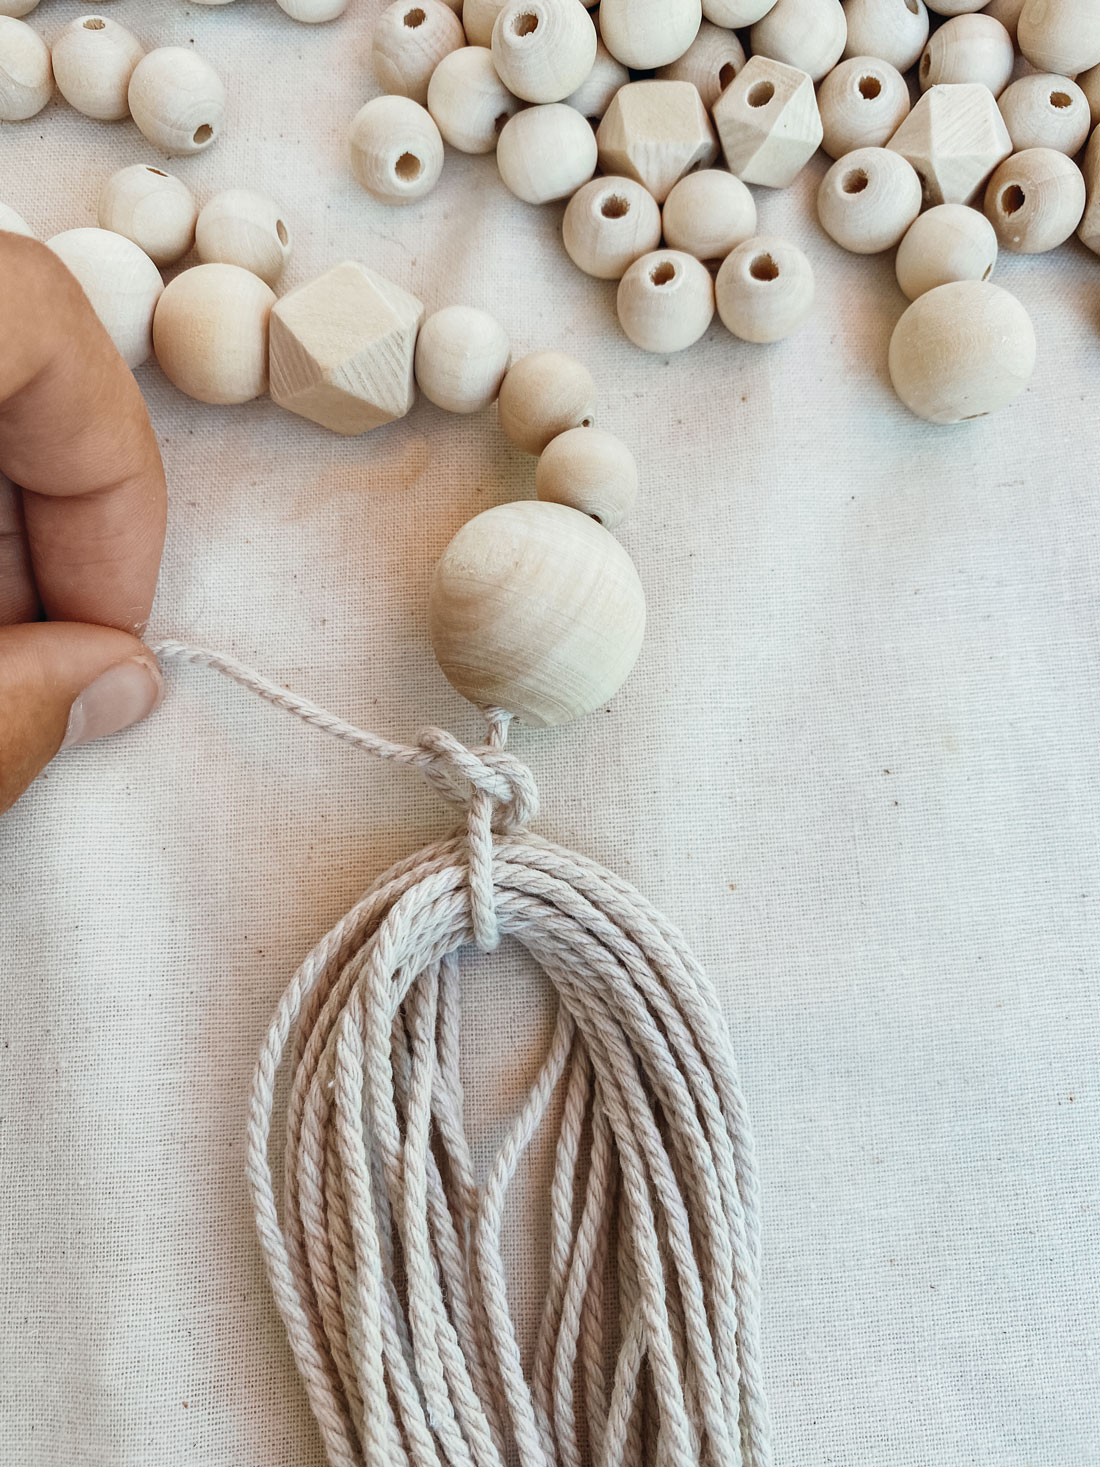
Next you will want to cut individual strings to create your tassel. Cut them twice as long as the length you want your finished tassel to be, then fold in half. Tie the string you used to thread your beads on around the middle where of where your individual strings were folded in half. Tie the knot as tight as you can, and as close to the last bead as you can get it.
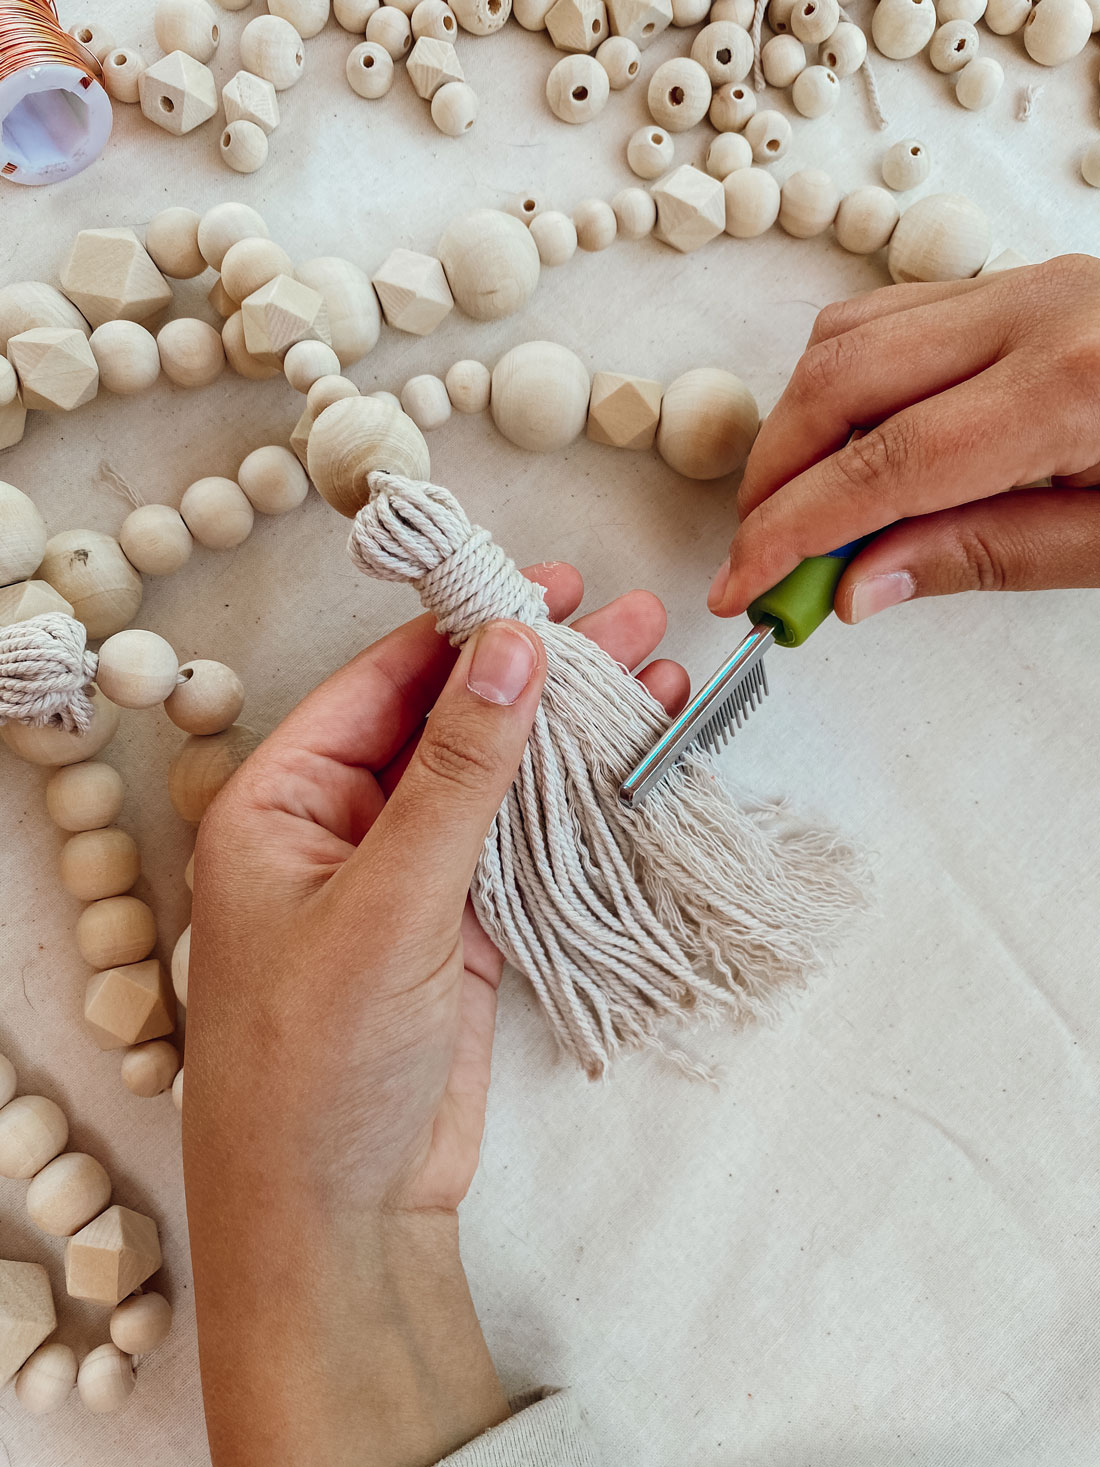
Wrap another piece of string around the individual strings to create the top of the tassel. Then tie. Brush out the bottom parts of your tassel if desired for that particular look.
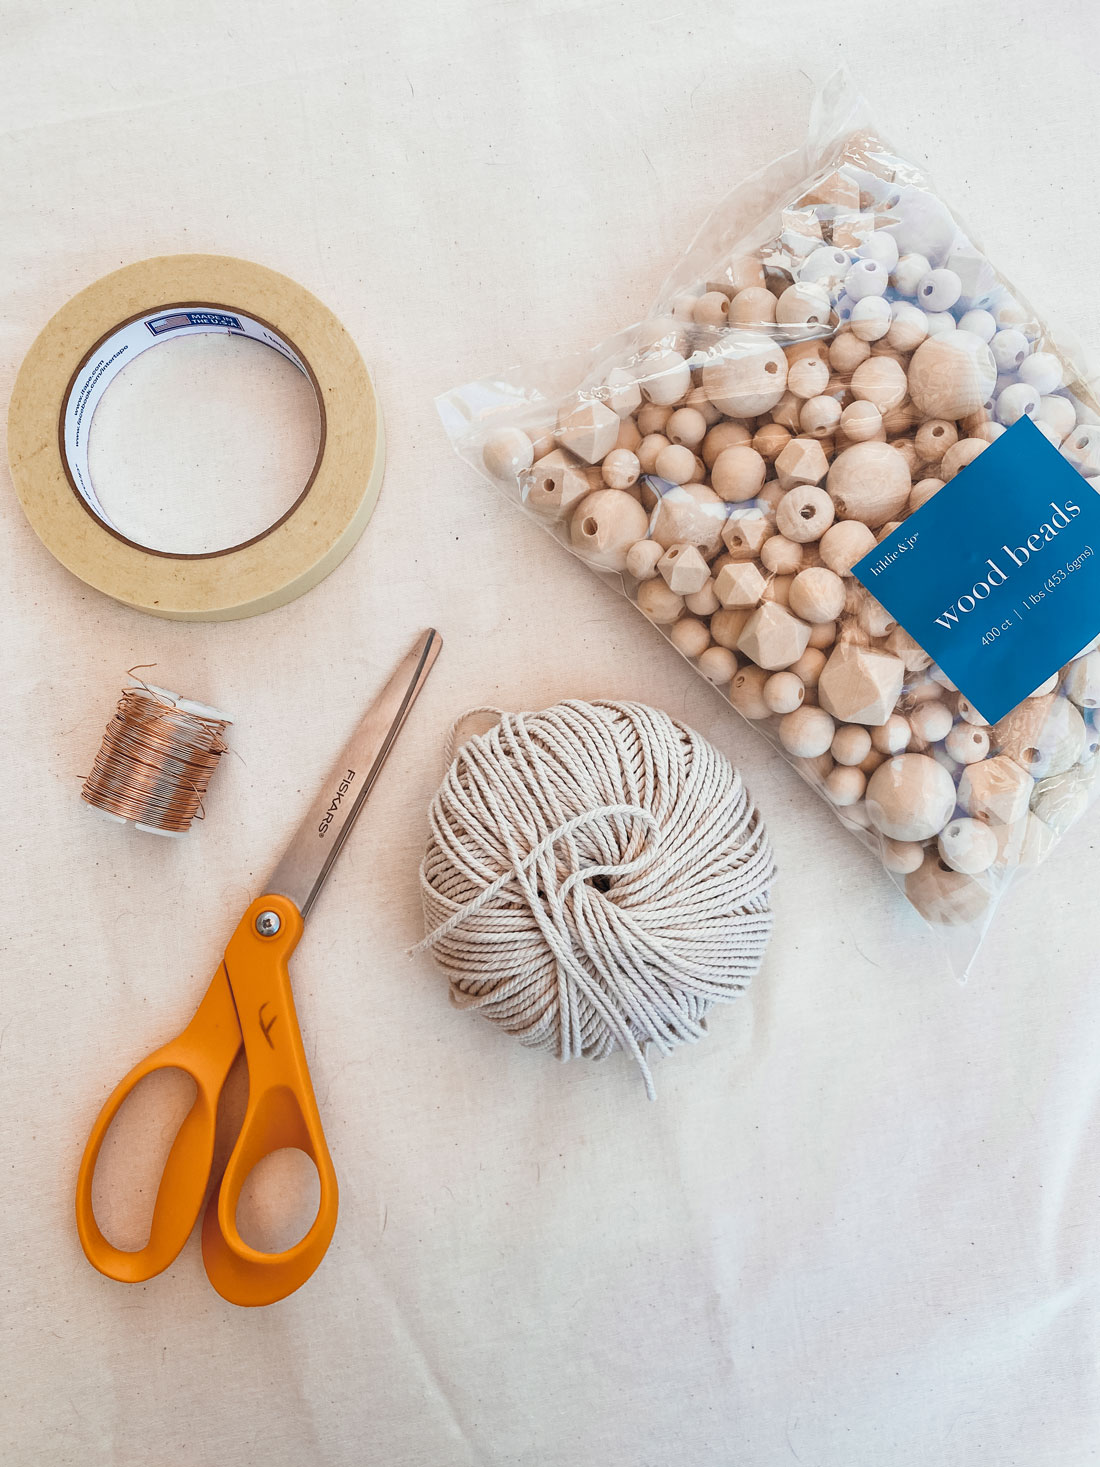
Supplies You'll Need for this Project
• wood beads
• scissors
• masking tape
• twine/string


Style as desired and enjoy!

